Scenarios
A scenario is a copy of your plan where you can try a change, such as a hiring plan, a reorganisation or a pay review, and see what it costs. Changes to live data keep flowing into the scenario, so you never work from stale numbers. Nothing in a scenario touches the real numbers until someone reviews and merges it.
You need access to scenarios — ask your Flowstate admin. Approving and merging scenarios needs its own access.
How scenarios relate to live data is explained in Live data and scenarios.
Try it: move someone and see the cost
- Select Plan a scenario in the top bar, then +. Enter a Scenario Name and select Create Scenario.
- Go to Resourcing → People and teams → Playground.
- Drag a person from their team’s card onto another team’s card.
- In Change Team, choose Move entirely to the target team, set the Date of change, and select Confirm Movement.
- Go to Finance → Forecast, select Highlight and tick Financial Impact. The rows the move changes are highlighted.
- Select Exit scenario in the sidebar. Live data is exactly as it was.
Find your scenarios
My scenarios in the sidebar lists the scenarios you created, under All scenarios.
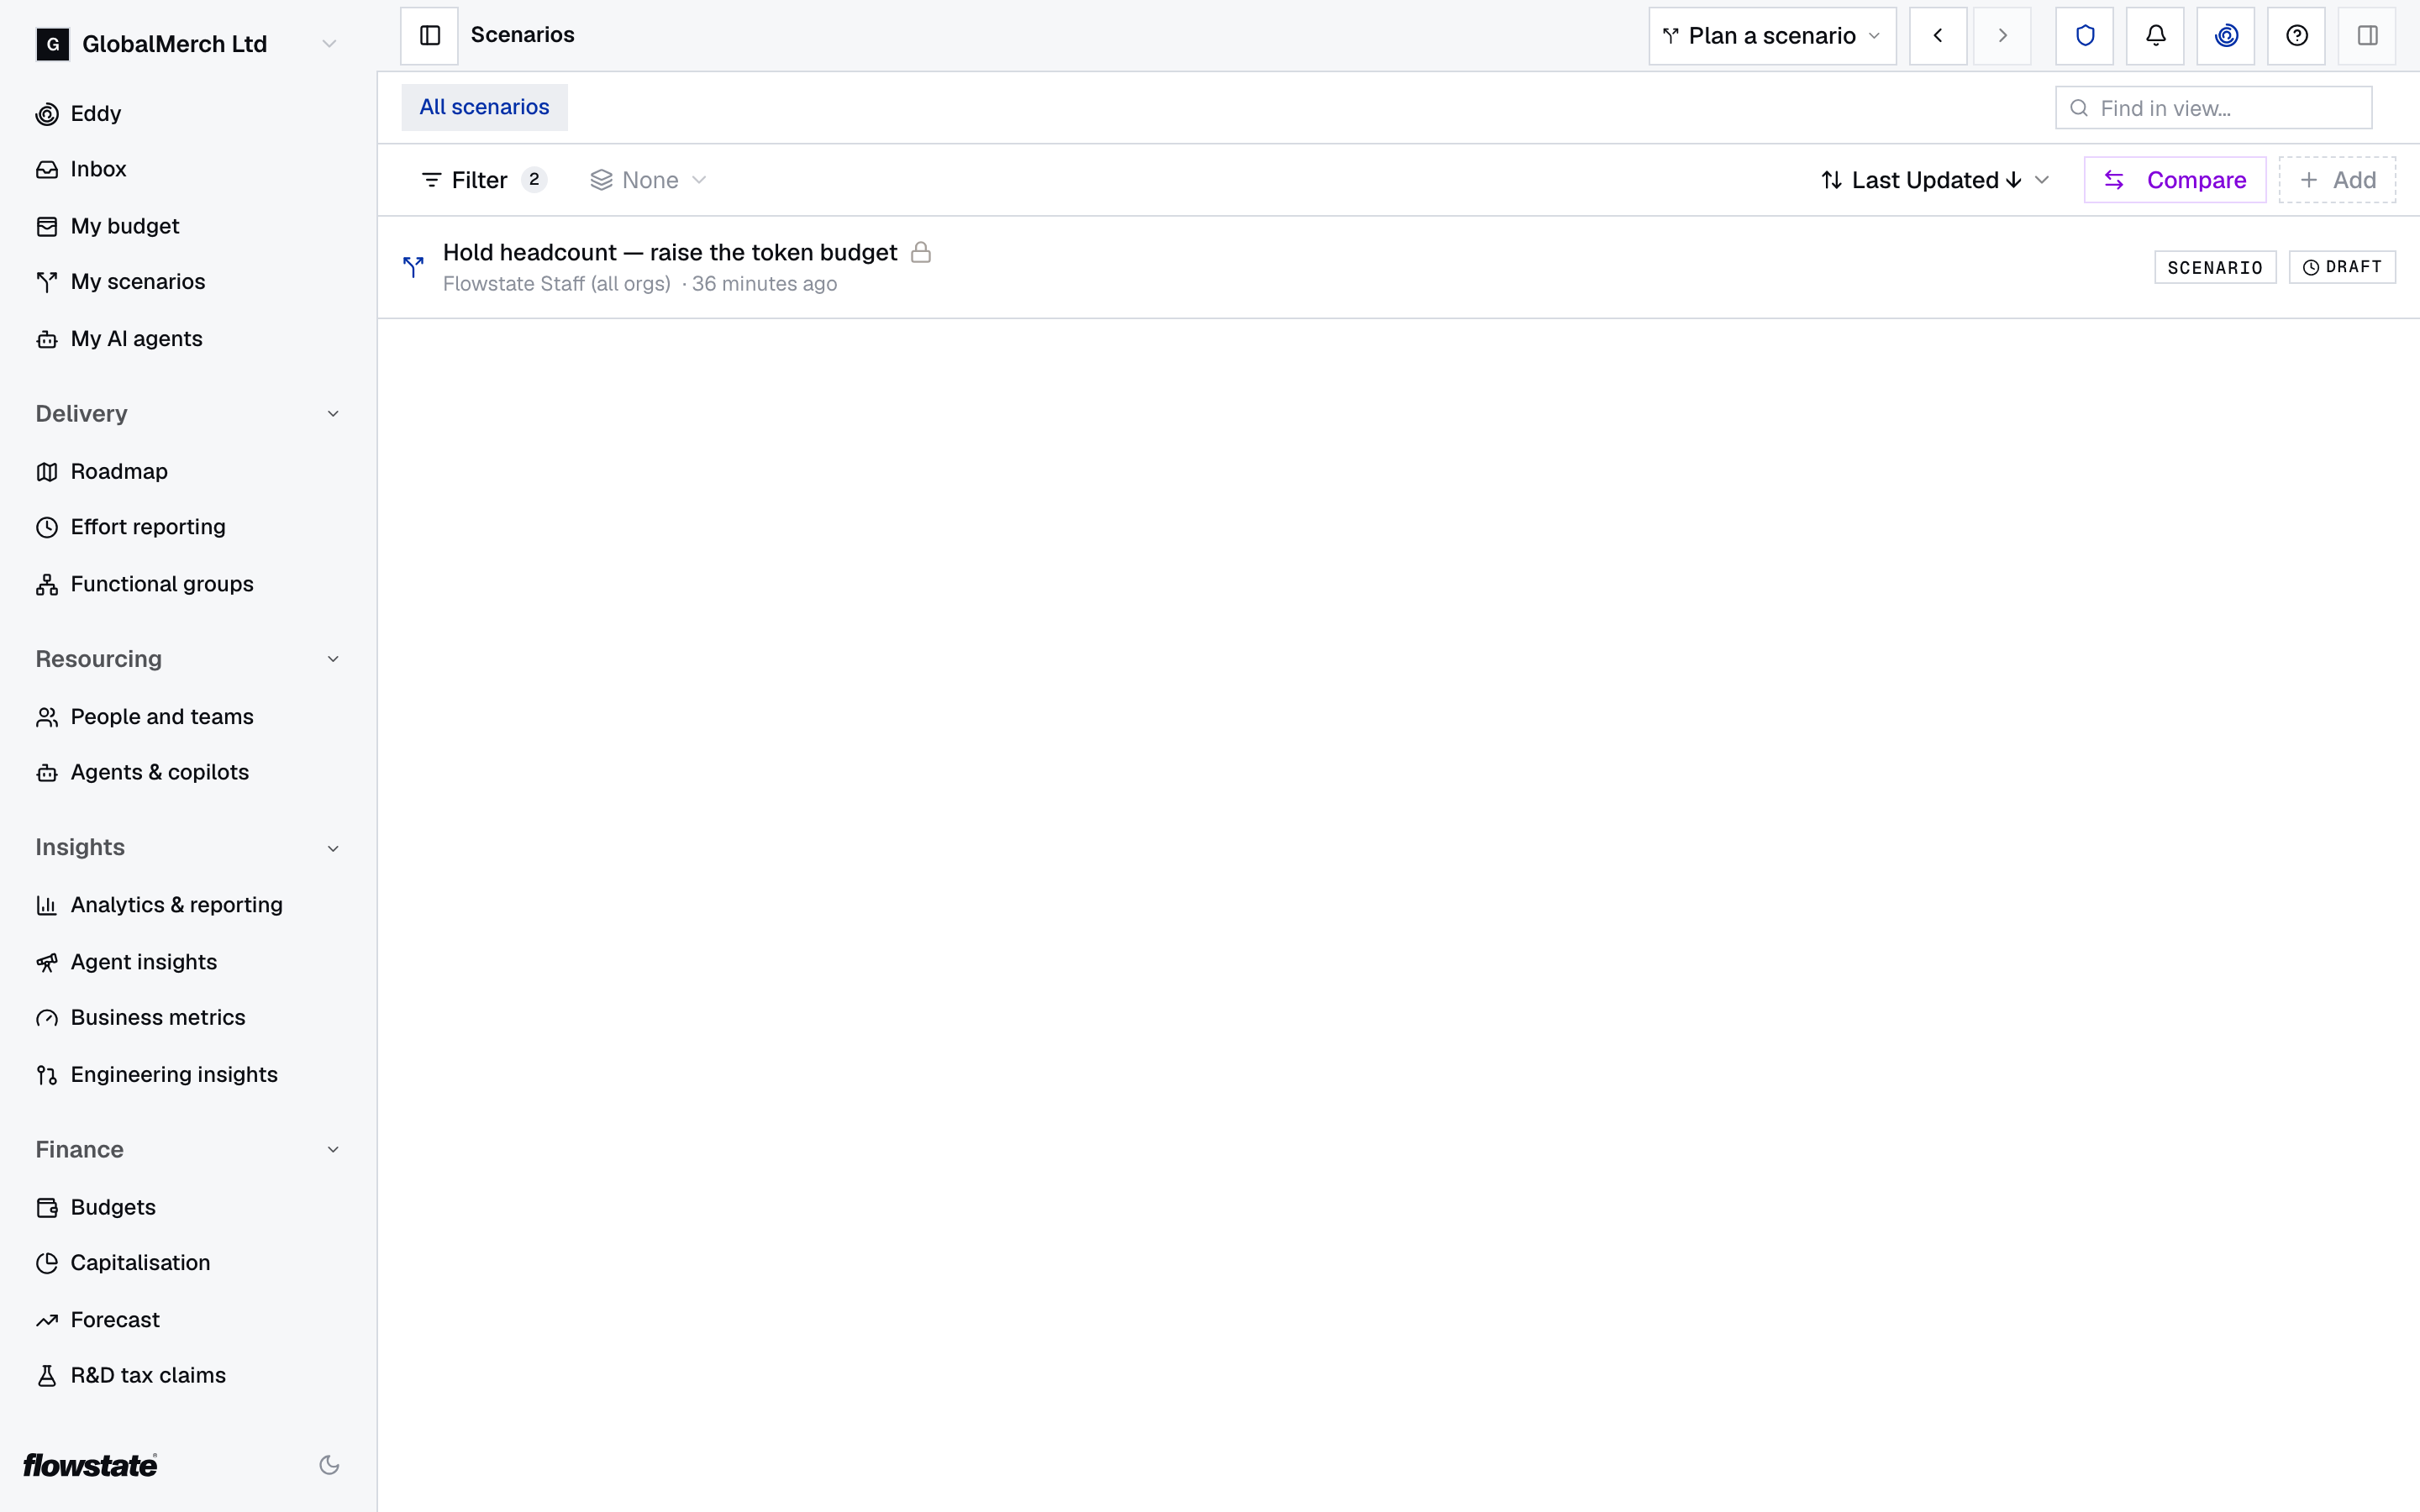
- Sort: use Sort by to order the list by Last Updated, Created or Name, ascending or descending.
- Group: use Group by to choose None or Status.
- Archived scenarios: they’re hidden. Select Filter, then tick Archived under Status to show them.
- Search: type a scenario’s name in Find in view… at the top of the page.
The Budgets tab lists the team budgets you’ve been assigned to fill in. Select one to open it. See Fill in your team’s budget.
To see every scenario that’s open to your organisation, open a comparison and select Back to scenarios.
See a scenario’s details
- On My scenarios, select the scenario. Inside a scenario, select Plan details at the top of its Overview.
- The details panel opens:
- Overview (the button at the left of the tabs): the Title, Status, Visibility, Type and who created it, the Headcount impact, and Actions.
- Changes: how many records the scenario adds, changes or removes, by type.
- Cost impact: the Total cost delta and Current vs forecast cost.
- Changes log: see the note below.
- Comments (the button at the right of the tabs).
Actions shows what you can do next. Depending on the scenario’s status and your access, that’s Submit for Review, Merge into Baseline, Withdraw, Approve & Merge, Reject or Revert Merge, plus Switch to scenario, Archive scenario and Delete scenario.
Create a scenario
From My scenarios
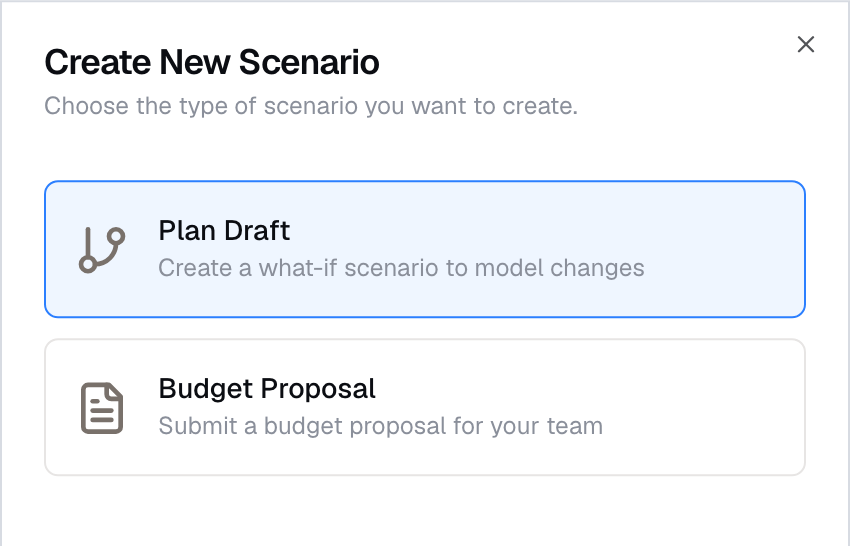
- Select My scenarios in the sidebar, then Add.
- In Create New Scenario, choose Plan Draft.
- Enter a Name.
- Pick a Type: Budget Planning, Headcount Planning, Restructure or Other.
- Choose Visibility: Private (only you) or Open (visible to organization).
- If you like, fill in Description (optional).
- Select Create Scenario.
The scenario opens on its Overview.
From any screen
- On live data, select Plan a scenario in the top bar.
- Select +.
- In Create New Scenario, enter a Scenario Name and, if you like, a Description (Optional).
- Select Create Scenario.
You’re taken into the new scenario on the screen you were on. A scenario created this way is private and has no type. To share it, change who can see it.
A new scenario starts with no changes, so it shows live data.
Team budgets aren’t created here. Use a budget run instead of the Budget Proposal option: each team’s manager opens their budget from My budget. See Fill in your team’s budget.
Enter a scenario
From My scenarios, double-click the scenario, or right-click it and select Switch to scenario.
From any screen on live data:
- Select Plan a scenario in the top bar.
- Select a scenario, or type in Search scenarios… to find one by its name or owner.
The list shows your own scenarios and any that are open to your organisation. You stay on the same screen, now showing the scenario.
To leave, select Exit scenario in the sidebar.
Make changes in a scenario
- Enter the scenario.
- Make your changes on the usual screens. For example:
- add vacancies for a hiring plan;
- move people between teams, or use Playground;
- change allocations, end dates or salaries;
- archive a team that a reorganisation closes.
- When you’ve finished, select Exit scenario to go back to live data.
While you’re in a scenario, the sidebar shows Scenario at the top, with Overview and Compare. Every screen shows live data with your changes on top. Anything you haven’t changed keeps following live data.
See what a scenario changes
- Overview, in the scenario sidebar, shows the Change Summary (Employees, Teams, Projects, Vacancies, Contractors and Total Cost), Recent Changes, Project Impact and Forecast.
- On Finance → Forecast, select Highlight and choose FTE Impact or Financial Impact to mark the rows the scenario changes.
- To put it side by side with live data or another scenario, see Compare scenarios.
See every change
- On the scenario’s Overview, under Recent Changes, select View All Changes. The full list opens below, grouped by type.
- To go to the records behind a group, select View all → next to it. The People, Teams, Projects, Vacancies or Contractors list opens.
- On that list, set Group by to Changed in Plan to bring the changed records together.
- Select Hide Details on Overview to close the list again.
You can also see every change from any screen: select the changes menu (the clipboard icon in the top bar), then View All Changes. The Scenario changes panel opens. Select a name to open that record.
Remove a single change
While the scenario is still a draft:
- On the scenario’s Overview, select View All Changes.
- Point at the change and select the X.
- In Remove Change, select Remove.
You can do the same from the Scenario changes panel: select the clipboard icon in the top bar, then View All Changes, and select the X on the row.
If you remove someone or something you added in the scenario, their allocations in the scenario go too.
Submit a scenario for review
- Open the scenario and select Overview in the scenario sidebar.
- Select Plan details.
- In Actions, select Submit for Review. It appears once the scenario has at least one change.
- Under Reviewers, add one or more people, or leave it empty so anyone who can approve scenarios can review it.
- Confirm.
The scenario’s status becomes In Review. Reviewers get a task in their Inbox; see Review a scenario from your Inbox.
To take it back, select Withdraw in the same place. The scenario returns to Draft.
Approve and merge a scenario
- Open the scenario from your Inbox task, or from My scenarios.
- Check its Overview, and select View All Changes.
- Compare it with live data.
- Select Plan details, then in Actions select Approve & Merge.
- In Merge Scenario into Baseline, confirm.
Every change is applied to live data at once, and the scenario’s status becomes Merged. Only what the scenario changed is updated.
You can’t approve your own scenario. If reviewers were named, only they can approve it.
Merge a draft straight away
This is for people who can merge scenarios. It skips review: nobody else approves the changes before they reach live data.
- Open the scenario and select Plan details on its Overview.
- In Actions, select Merge into Baseline. It appears once the draft has at least one change.
- In Merge Scenario into Baseline, check the changes listed and select Merge.
The scenario’s changes are applied to live data and its status becomes Merged. To undo it, see Undo a merge.
Inside a draft, Merge Scenario in the changes menu (the clipboard icon in the top bar) takes you to the scenario’s Overview. Merge from Plan details there.
Send a scenario back
- Select Plan details, then in Actions select Reject.
- In Reject Scenario, enter a Reason.
- Confirm.
The scenario returns to Draft, marked Changes requested with your reason, so the person who submitted it can fix it and submit it again.
Undo a merge
- Open the merged scenario and select Plan details.
- In Actions, select Revert Merge.
- Confirm.
Live data goes back to how it was before the merge. The scenario returns to Draft with all its changes, so you can fix it and submit it again.
Comment on a scenario
- Open the scenario’s details: select it on My scenarios, or select Plan details on its Overview.
- Select Comments, the button at the right of the tabs.
- Type in Add a comment… and select Post.
Rename a scenario
- On My scenarios, right-click the scenario and select Rename. The details panel opens.
- Select the name next to Title, type the new name and press Enter.
Change who can see a scenario
- On My scenarios, right-click the scenario and select Change visibility.
- Choose Private (only you) or Open to organisation.
Anyone in your organisation can find, enter and compare a scenario that’s open to your organisation.
Archive a scenario
- On My scenarios, right-click the scenario and select Archive. You can also select Archive scenario in the details panel.
The scenario disappears from your list straight away. To see it again, select Filter and tick Archived.
Archiving can’t be undone. If you might still want to change the scenario, leave it as it is.
Delete a scenario
- On My scenarios, right-click the scenario and select Delete. You can also select Delete scenario in the details panel.
- Select Delete to confirm.
Deleting a scenario is permanent, and removes all its changes.
What only works in live data
Some actions change the real world, so they aren’t available inside a scenario:
| Action | What to do instead |
|---|---|
| Fill this vacancy | Merge the scenario or exit it, then fill the vacancy |
| What about the vacancy? when ending someone’s allocation early | Change the allocation’s end date in the scenario |
| The Skills tab | Skills belong to your organisation, so the tab is hidden in a scenario |
| Settings → Scenarios → Data Import | An import always changes live data, even if you’re inside a scenario |
| The budget selector on Finance → Forecast | Compare budgets with live data, outside the scenario |
If something’s not right
There’s no Plan a scenario button. You’re already inside a scenario. Select Exit scenario first. If it’s still missing, scenarios aren’t turned on for your organisation.
There’s no + in Plan a scenario, or no Add on My scenarios. You don’t have access to create scenarios. Ask your Flowstate admin.
A scenario is missing from My scenarios. It’s archived, or someone else created it. Tick Archived under Filter, or ask its owner to open it to your organisation.
You can’t change the title. Merged and archived scenarios can’t be renamed.
There’s no X to remove a change. Changes can only be removed while the scenario is a draft. Point at the row to show the X.
There’s no Submit for Review button. The scenario has no changes yet, or you don’t have access to edit scenarios.
There’s no Merge into Baseline button. The scenario isn’t a draft, it has no changes yet, or you don’t have access to merge scenarios.
“You cannot approve your own scenario”. Ask someone else who can approve scenarios. If you named reviewers, it must be one of them.
There’s no Approve & Merge button. Reviewers were named and you aren’t one of them, or you don’t have access to approve scenarios.
Numbers in the scenario changed, though you didn’t touch them. Anything you haven’t changed follows live data, so it moves when live data does.
You can’t change a salary in the scenario. You don’t have access to pay in scenarios. Ask your Flowstate admin.
For your technical team
The REST API works inside a scenario when you add the scenario’s ID to a request. See Live data and scenarios.